Monday 21 January 2013

How to send Self Destructing Password Protected Messages and Emails.

Privacy and data security is always an important thing which we care while using the Internet. We also know that hackers more active these days and they always try to hack into our emails and other accounts. So it is always risky to share important messages.Sometimes we wish to send emails that also have password protection. In case the other user's account  has been hacked, important email is still secure. If the information is risky to be stored, we can also try to send self destructing messages. These messages will be destroyed just after being read.

For this kind of secure communication, We can try a new amazing service called NoteDIP . NoteDIP allows users to send password protected self destructing messages via emails and instant messages.

NoteDip mainly allows users to do these two things.
  • Users can send self-destructing messages
  • Users can send password protected self-destructing messages
In case you want to know when your message was read, you can also enter your email id and it will send you the notification email.

How it Works? 

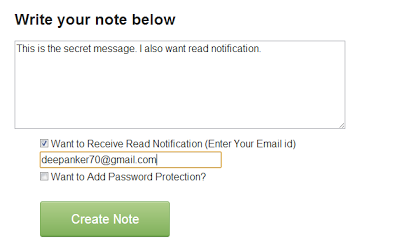
Visit the NoteDip.com where you will see a big text area. Write your secret note in the text area. below the text area, you will see two checkboxes. If you want to receive the notification when your message was read, select the first checkbox asking for your email and then enter your email address where you want to receive notification.
If you want to this message to be password protected, select the second checkbox and enter the password there. 
 

After this, click on Create note button.
Now you will get a long URL. Select this link and copy it. Now either send it via email of send it via instant messages. 
When the other person will click on the link, he will be able to read the message. If you have also added the password, do not forget to send password along with the URL. 

After the note has been read first time, it will be destroyed and will never be available. If someone else or you will click on the link, it will show you an error message.


http://notedip.com/ 
 

How To Hide Any Drive Through GPEDIT

In that case Group Policy Editor will come in play.

Here is how to do it :


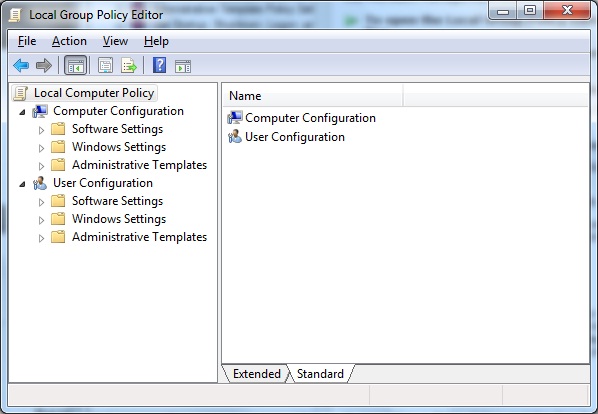
Step 1. Open Group Policy Editor (Press Win+R and type Gpedit.msc and pressEnter)


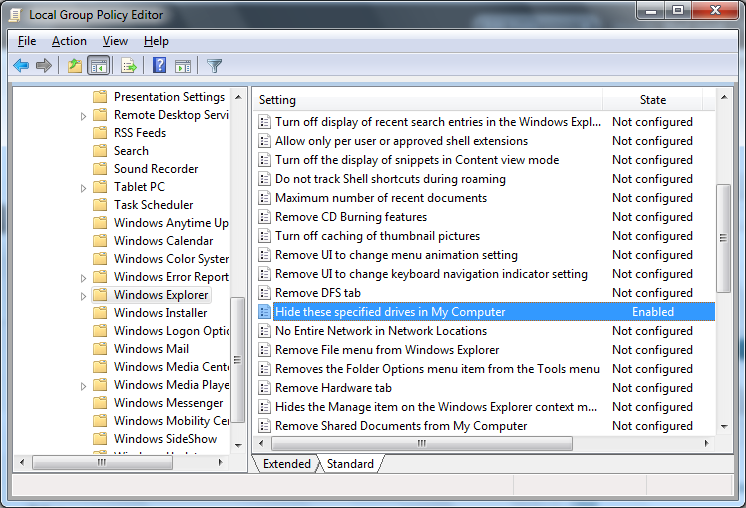
Step 2. Navigate to User Configuration > Administrative Templates > Windows Component > Windows Explorer
Step 3. Now on the right Hand side i.e Settings Pane look for Hide these specified drives in My Computer.
Step 4. Double Click on it and Enable it, now choose from the drop down box which drive you want to hide (I choose All – Restrict All Drives)
Step 5. Now click on Apply and click OK, now you can see that Hide these specified drives in My Computer is Enabled.

Step 6. Now logoff and login back to see changes.
How to revert back -
In order to get them back go to Gpedit and set the Hide these specified drives in My Computer setting to Disable. That’s it.

How to Recover Deleted Files without Using Software.

I'm gonna discuss an easiest Data Recovery Method.

Sometimes we might have delete some important files accidentally and we need them back. 
Today I'll show you a trick to recover your deleted files without using any 3rd party software. I'm not talking about restoring files from recycle bin.
This simple trick mostly works on Vista versions and all the Windows 7 versions.
So let's see how to recover deleted file without using any software 
For example lets assume that you have permanently deleted "My Sweet Heart.JPG"from the folder named "My LIFE" ;) , and now you want to recover "My Sweet Heart.JPG" back.
Do this simple trick to recover your Sweet Heart.JPG
Right Click on the particular folder
Select "Restore previous versions"

That's all, now you will see a option to recover the particular file.


If you don't see "Restore previous Versions" by Right Clicking, Go to
Control Panel -->
System and Secutiry -->
System -->
Click on System Protection (in left sidebar) -->
Select the particular drive and Click Configure -->
Then select "Restore system setting and previous versions of files" -->
Now Click on OK

Note : 
Previous versions come from restore points or from windows backup.
This trick will not work at all the time.

If you haven't get back your deleted files yet, 
Use this Powerful Data Recovery Software (Recuva) to recover your deleted files.